
Fast Facts
- Print + Copy + Scan + Fax all-in-one printer
- Two internal trays + rear feed tray (600+ page capacity)
- Four-colour pigmented ink 1680 nozzle print engine
- FSOT (First Set Out Time) 16.2s four-page colour. B&W in 13 seconds,
- Colour simplex print speed (ESAT) 19.8PPM, duplex 11.8PPM
- Wide format duplexed printing up to ledger/tabloid (11 x 17) or A3 (11.7 x 16.5) paper
- Borderless on any type up to ledger
- Auto-duplexing automatic document feeder (ADF) scans both sides simultaneously at up to 600dpi
- Flatbed scanner optical 1200dpi, interpolated 9600dpi
- Scan to USB, computer, network folder, cloud, and email
- PCL6 & Postscript
- Good candidate for aftermarket refillable ink cartridges.
Synopsis
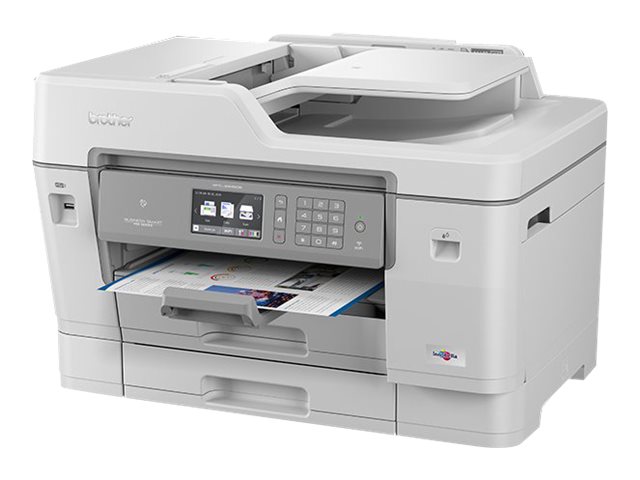
The Brother MFC-J6945DW is just impressive at every turn. As an office printer it easily competes with offerings that are more than four times its price. As a home printer it’s expensive enough to be a bit painful, but with a price-per-page and feature set that makes it attractive even there. Originally my second choice behind the Epson WF-7720, this printer has come from behind to become, at first, a reluctant pick for purchase and then on to delight and surprise so much that it has turned out to be, hands down, the finest printer I’ve ever owned.
If you’re not interested in pre-purchase considerations, then feel free to skip down to the “in the field” section.
Contents
Pre-Purchase Considerations
Purchase Motivation
The main (and most urgent) motivator for the purchase of this printer was an upcoming aircraft controller training course and an existing HP OfficeJet 7610 that has been a disaster for years. It’s a very challenging course and it’s imperative to have a printer that can be trusted for the myriad of pubs, quizzes, study guides, and administrative stuff I’ll need to print. Reliability and consistency, after the expensive boondoggle of my last printer, are especially important.
Requirements
- Reliability, and this means long-term reliability.
- Duplex printing
- Duplex scanning (with the implied duplex copying)
- Wide format
- Good photographs
- Wi-Fi – actually the more connectivity options the better
- Low price-per-page printing, either inherently or through reliable aftermarket refillable cartridges or CISS.
Duplex printing is an absolute requirement, really, and not just a nice-to-have feature any more. An all-in-one printer that supports duplex scanning and duplex copying is a huge plus too, also on the order of a requirement. My last printer had an ADF, but it’s lack of duplex scanning (and inherent inability to copy double-sided documents without heroics) was a constant annoyance from day one. Wide format isn’t strictly required, but is a great “nice-to-have” feature for other uses and hobbies. My first introduction to wide-format capability was the HP OfficeJet 7610 which this printer is replacing. That printer may have been a disaster that I was happy to feed to the recycle center the day after I bought this one, but in the brief sunny breaks in its otherwise entirely troublesome life, being able to print wide format turned out to be more of a bonus than expected even in a home environment. From posters for fund raisers, to ham radio schematics. Equipment manuals with fold-out diagrams, bi-fold booklets… I have to say, once you have a printer that is capable of wide format it will surprise you how useful it actually is, even at home.
Photos are a factor too. I haven’t had an acceptable photo print capability for a while, and I want to regain that. I am not after professional-quality photos. One really needs a dedicated 5+ colour printer for that, but I do require it to be capability of respectable glossies.
Other Contenders
Canon doesn’t make a wide-format all-in-one. And HP has removed itself from the running. So, besides this printer, the other potential contenders were:
-
Epson EcoTank ET-16500
This was the first printer I looked at more than casually. It’s basically an Epson WF-7620 with a continuous ink system factory-bolted onto the side. The allure of unlimited low-cost printing made my heart go pitty pat. The price tag, $1099CAD, made my stomach clench. Plus when they bolted the continuous ink system on the 7620 they ripped out the ability to do borderless printing! Likely this is a soft-restriction just in the driver, still it beggars belief Epson would do this and means the printer is useless for photos. High price, useless for photos, posters, brochures… why strap unlimited ink on a handicapped printer? Next.
-
Epson Workforce WF-7720
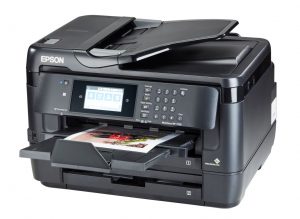
Epson WF-7720 Next I moved to the Epson WF-7720, which is a facelifted WF-7620. For some time this printer was my #1 choice. No Eco-Tank, but I was pretty sure it would work well with an aftermarket continuous ink system. If Epson could bolt one onto a WF-7620 to make the ET-16500, I’m sure I could too. It also seemed to meet all my other requirements. Borderless wide format printing, all the way up to super-tabloid 13″ x 19″, auto-duplexing ADF, and at $299CAD list price, it’s $150CAD cheaper than the Brother. In the end, though, the fact that it really is just a facelift of the 7620 is what eliminated it. My partner helped me make the hard decision here because I really had my heart set on the 13×19 capability of this printer. The WF-7720 print engine is old, slow, and many reviews suggested it had already had subpar graphics five years ago. Plus the ADF, while it will scan both sides, can only do this by scanning one side and then flipping the page. In the end, while the Brother is more expensive, it really seemed like it took quality seriously whereas Epson was still doodling around putting minor facelifts on an already aging system. Reluctantly, this printer was eliminated from consideration.
-
Dad and Grandad, the Brother MFC-J6935DW and MFC-J6930DW
Finally, I considered this review printer’s two immediate predecessors, both of which are still available. I considered them because they both have aftermarket ink refillable ink cartridges that are available now, and the 6945 doesn’t have one out yet. I eliminated “Dad” due to its cost. The MFC-J6935DW was never sold directly in Canada. It’s not hard to get online, but with shipping to Canada it’s more expensive. Grandad I eliminated simply due to age. Whereas Dad, the 6935, is likely identical to the 6945 except for the cartridge, the 6930 is another story. It has an older engine and from all accounts has visibly lower print quality. Only the availability of refillable aftermarket cartridges was making me consider them anyway, and a) I’m pretty sure they will become available for the 6945 and b) I’m not even sure I’ll ever use them, since the Brother’s price-per-page is basically less than paper.

Post-Purchase – “In the Field”
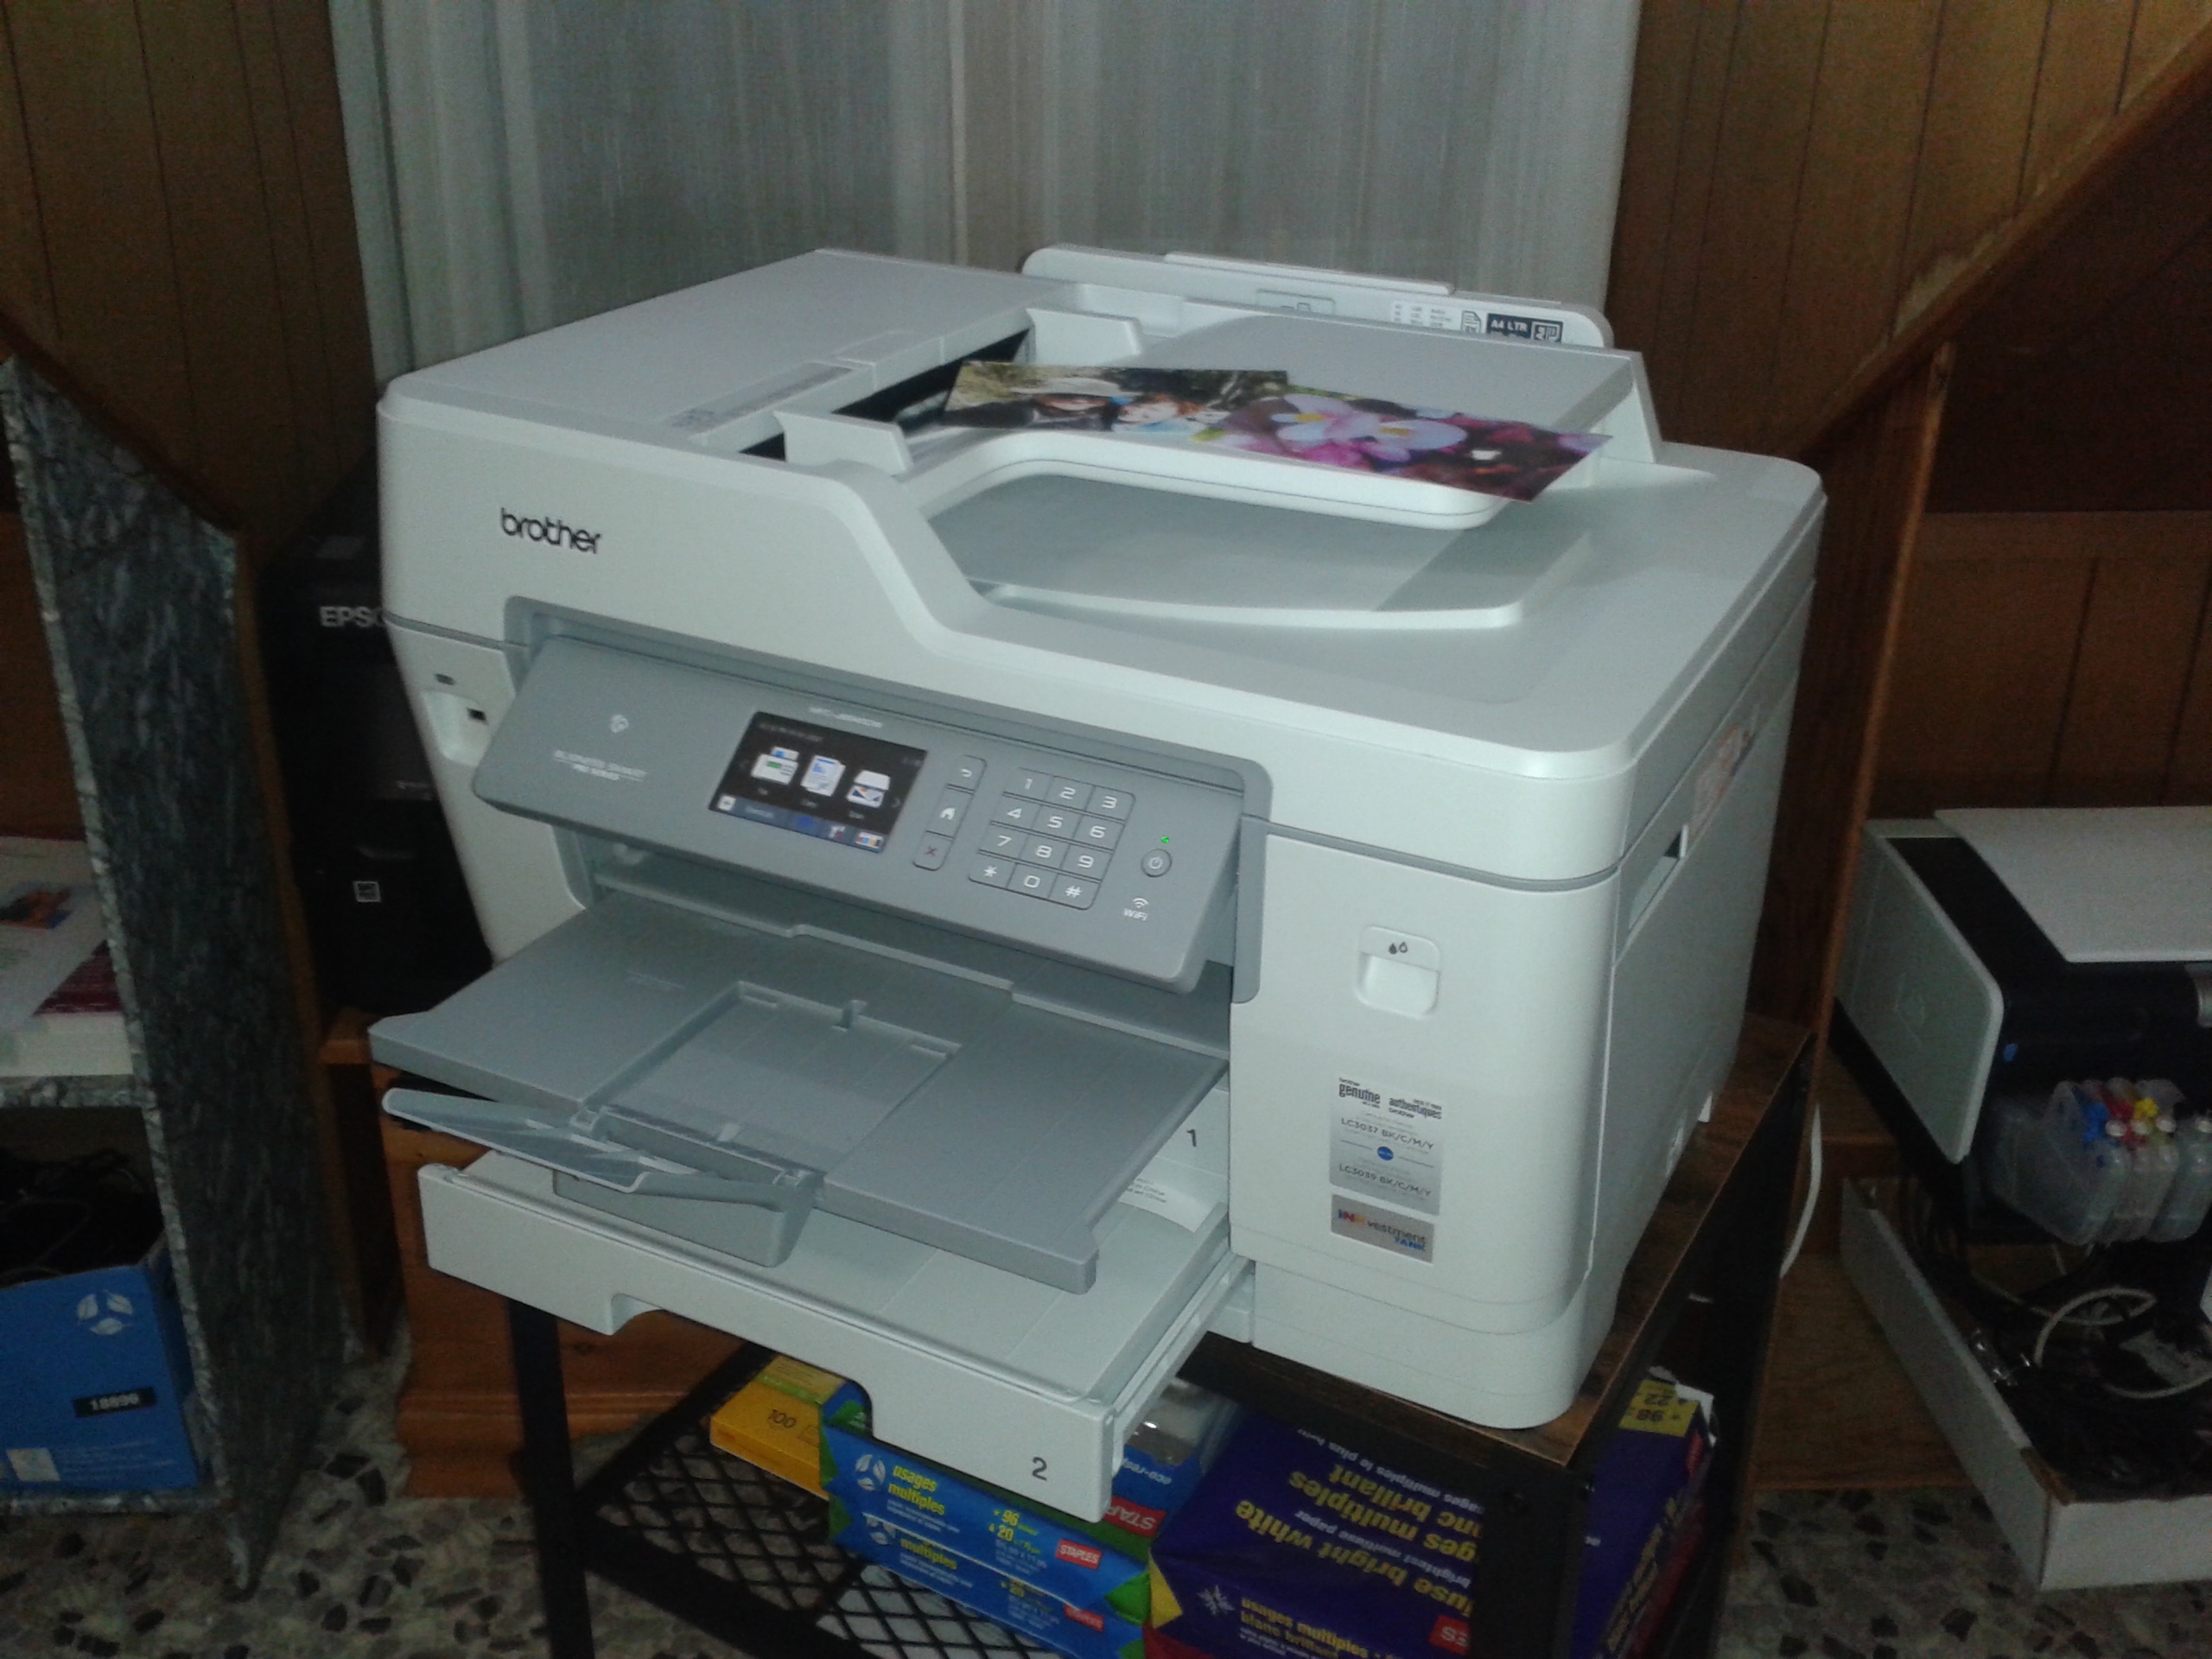
Unboxing
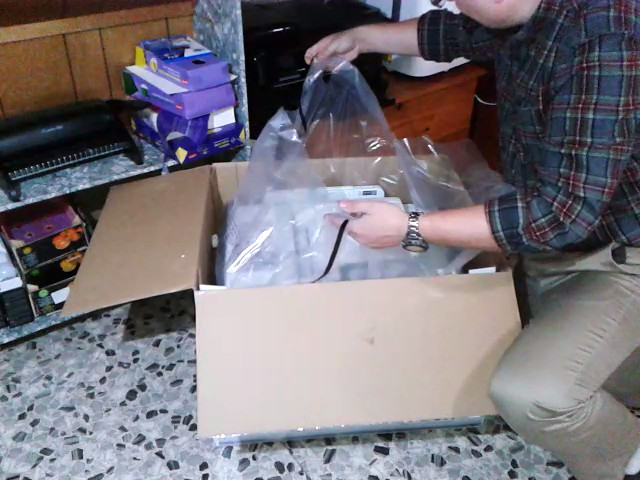
First impressions were good. Brother scored a point with me for their attention to detail right on opening the box. I love it when manufacturers put heavy items into an unboxing bag – a nice heavy bag with handles that you can use to just lift the unit out of the box. It makes unpacking quick, easy, and safe. This was just the first of the ways Brother’s attention to detail impressed me.
Physical Setup
Paper Handling
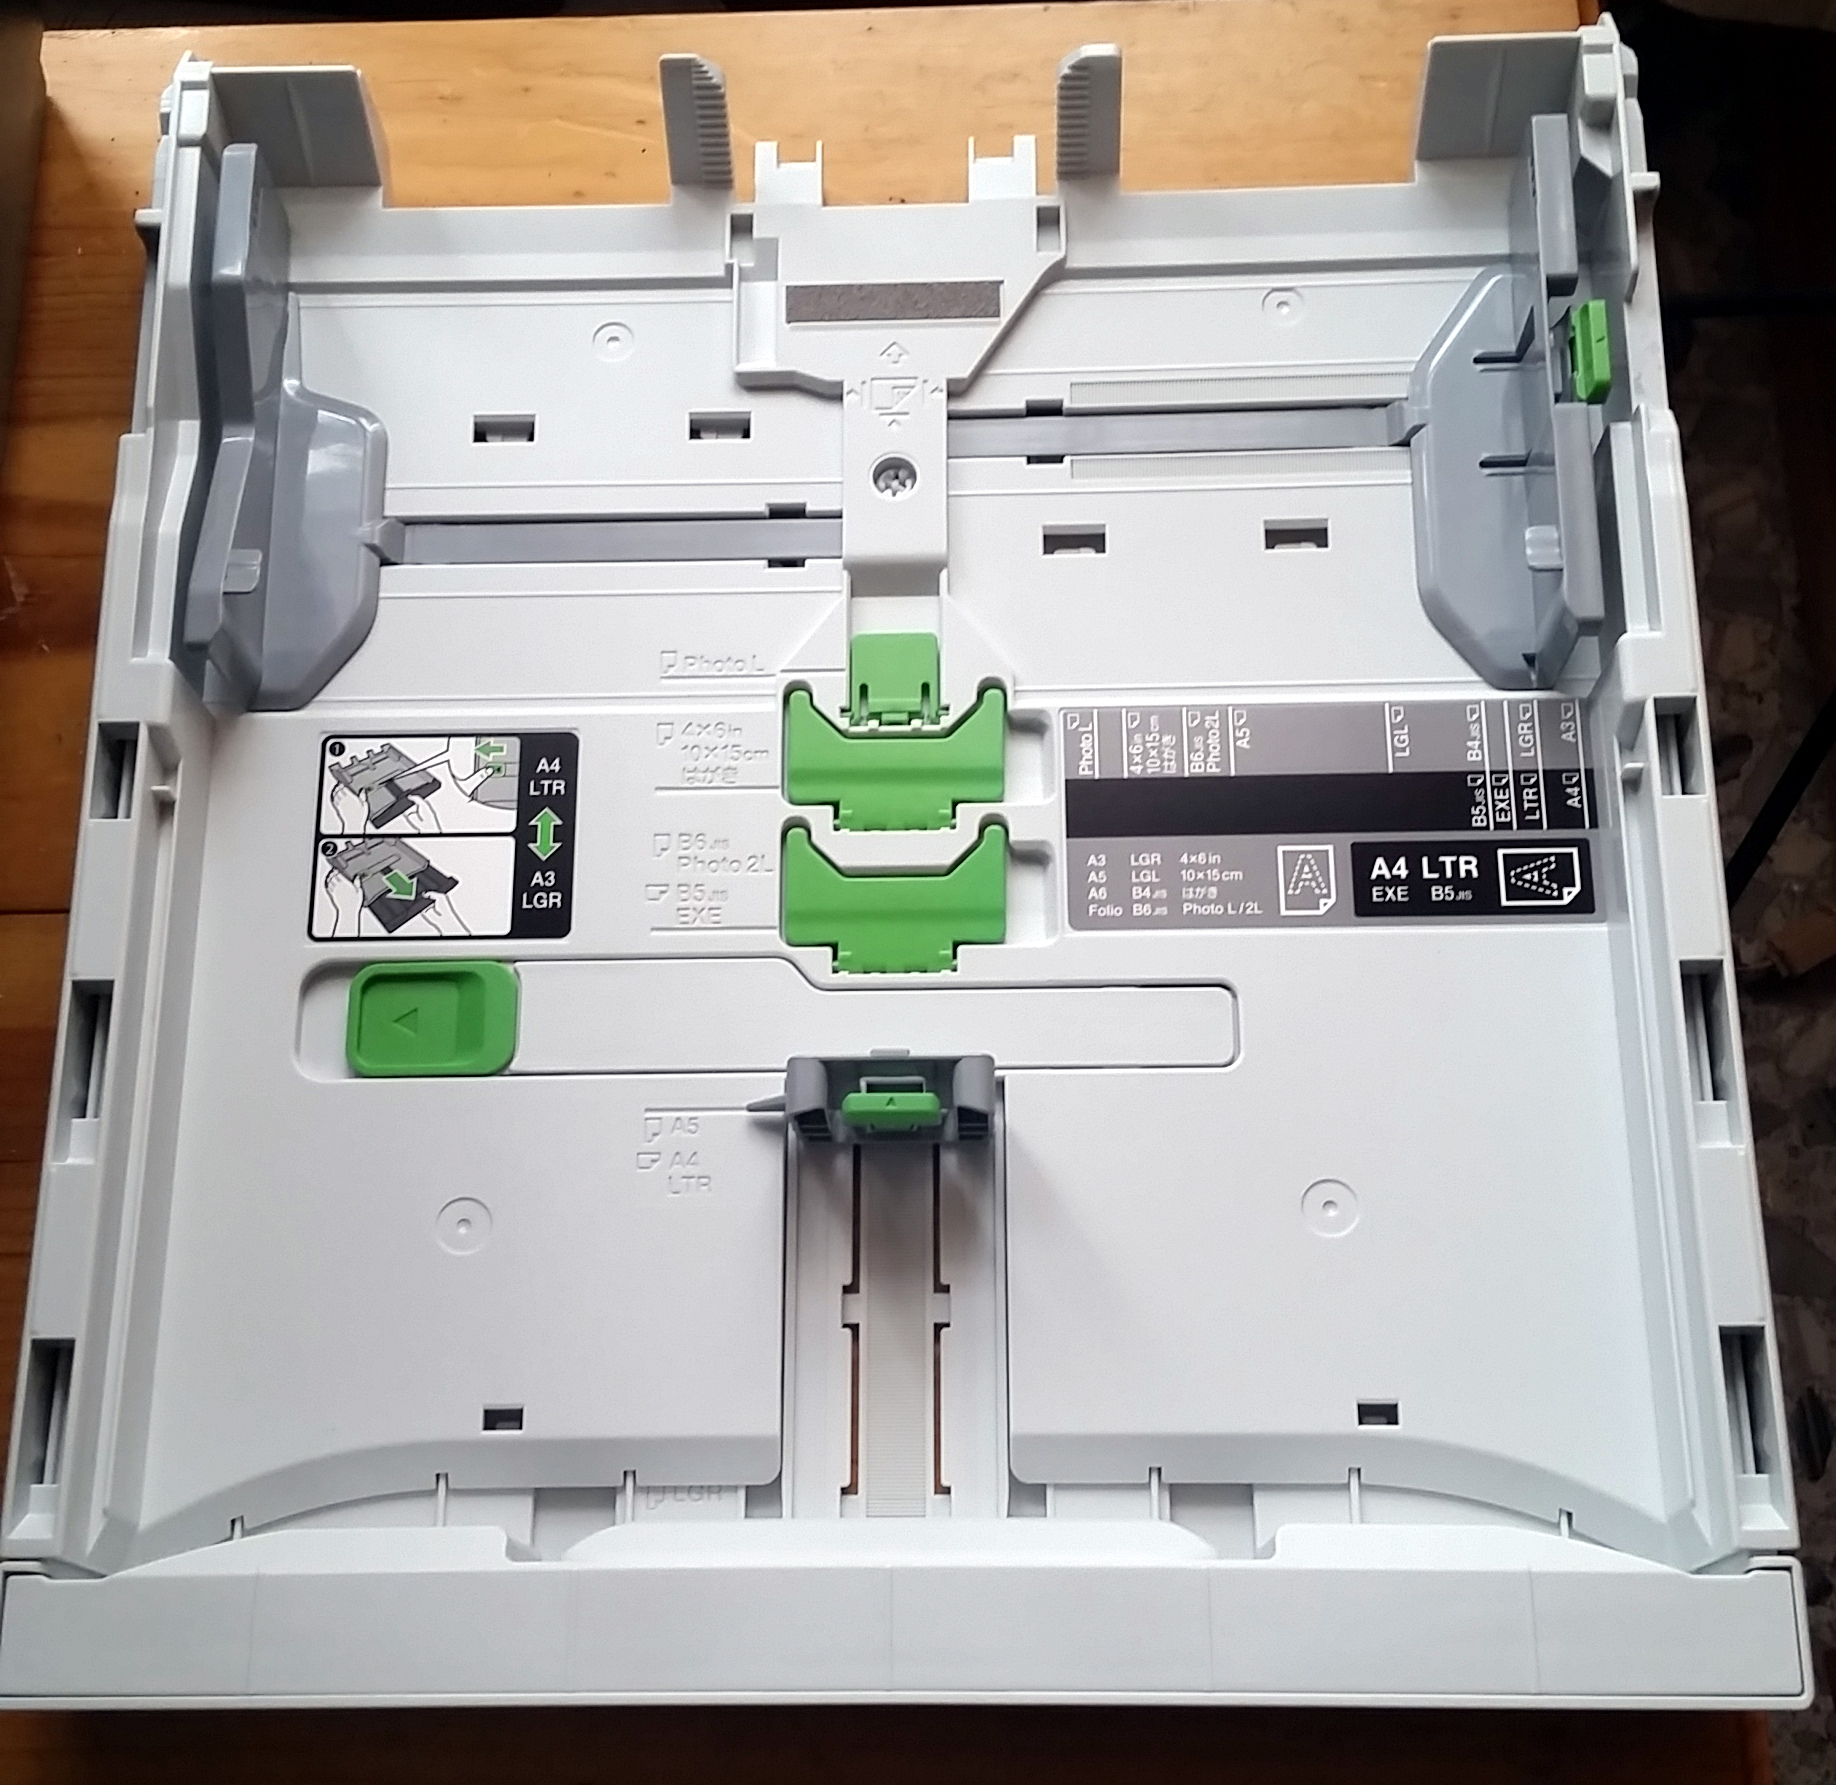
Initial physical setup of the printer continued to impress in two notable ways. First, the paper trays. And paper handling in general. I had compared the Brother and Epson WF-7720 in-store and already knew the Brother had sturdier print trays. What I hadn’t noticed, because in the store they were covered in paper, is that Brother’s #1 print tray is set up for easy and quick paper swapping with physical quick-flip guides for the most common photo sizes. This isn’t a must-have feature, but touches like this are indicators that a company takes usability seriously.
Paper handling in general for this printer is a dream. There are two main trays, each holding up to 250 sheets of standard-thickness paper. The rear feed, which many printers use for one-off prints, can actually hold another hundred 100 pages of standard thickness paper too (or similar thickness of photo paper). Each tray, even the rear, can take up to the full A3/Tabloid size the printer can handle. The only limitation on paper handling is that main tray #2 can’t be used for photo papers. Since you will want plain paper in at least one tray, this is not any kind of real problem.
The only thing that detracts from the excellent paper handling (and from Brother’s otherwise meticulous attention to detail) is the output tray. It’s a bit small and doesn’t do justice to the full capabilities of the printer. This printer could easily service a mid-size office, but if you send a print job of any size to it, you’ll want to peek to make sure no one else left a previous print job on it before you click print on yours.
Cabling
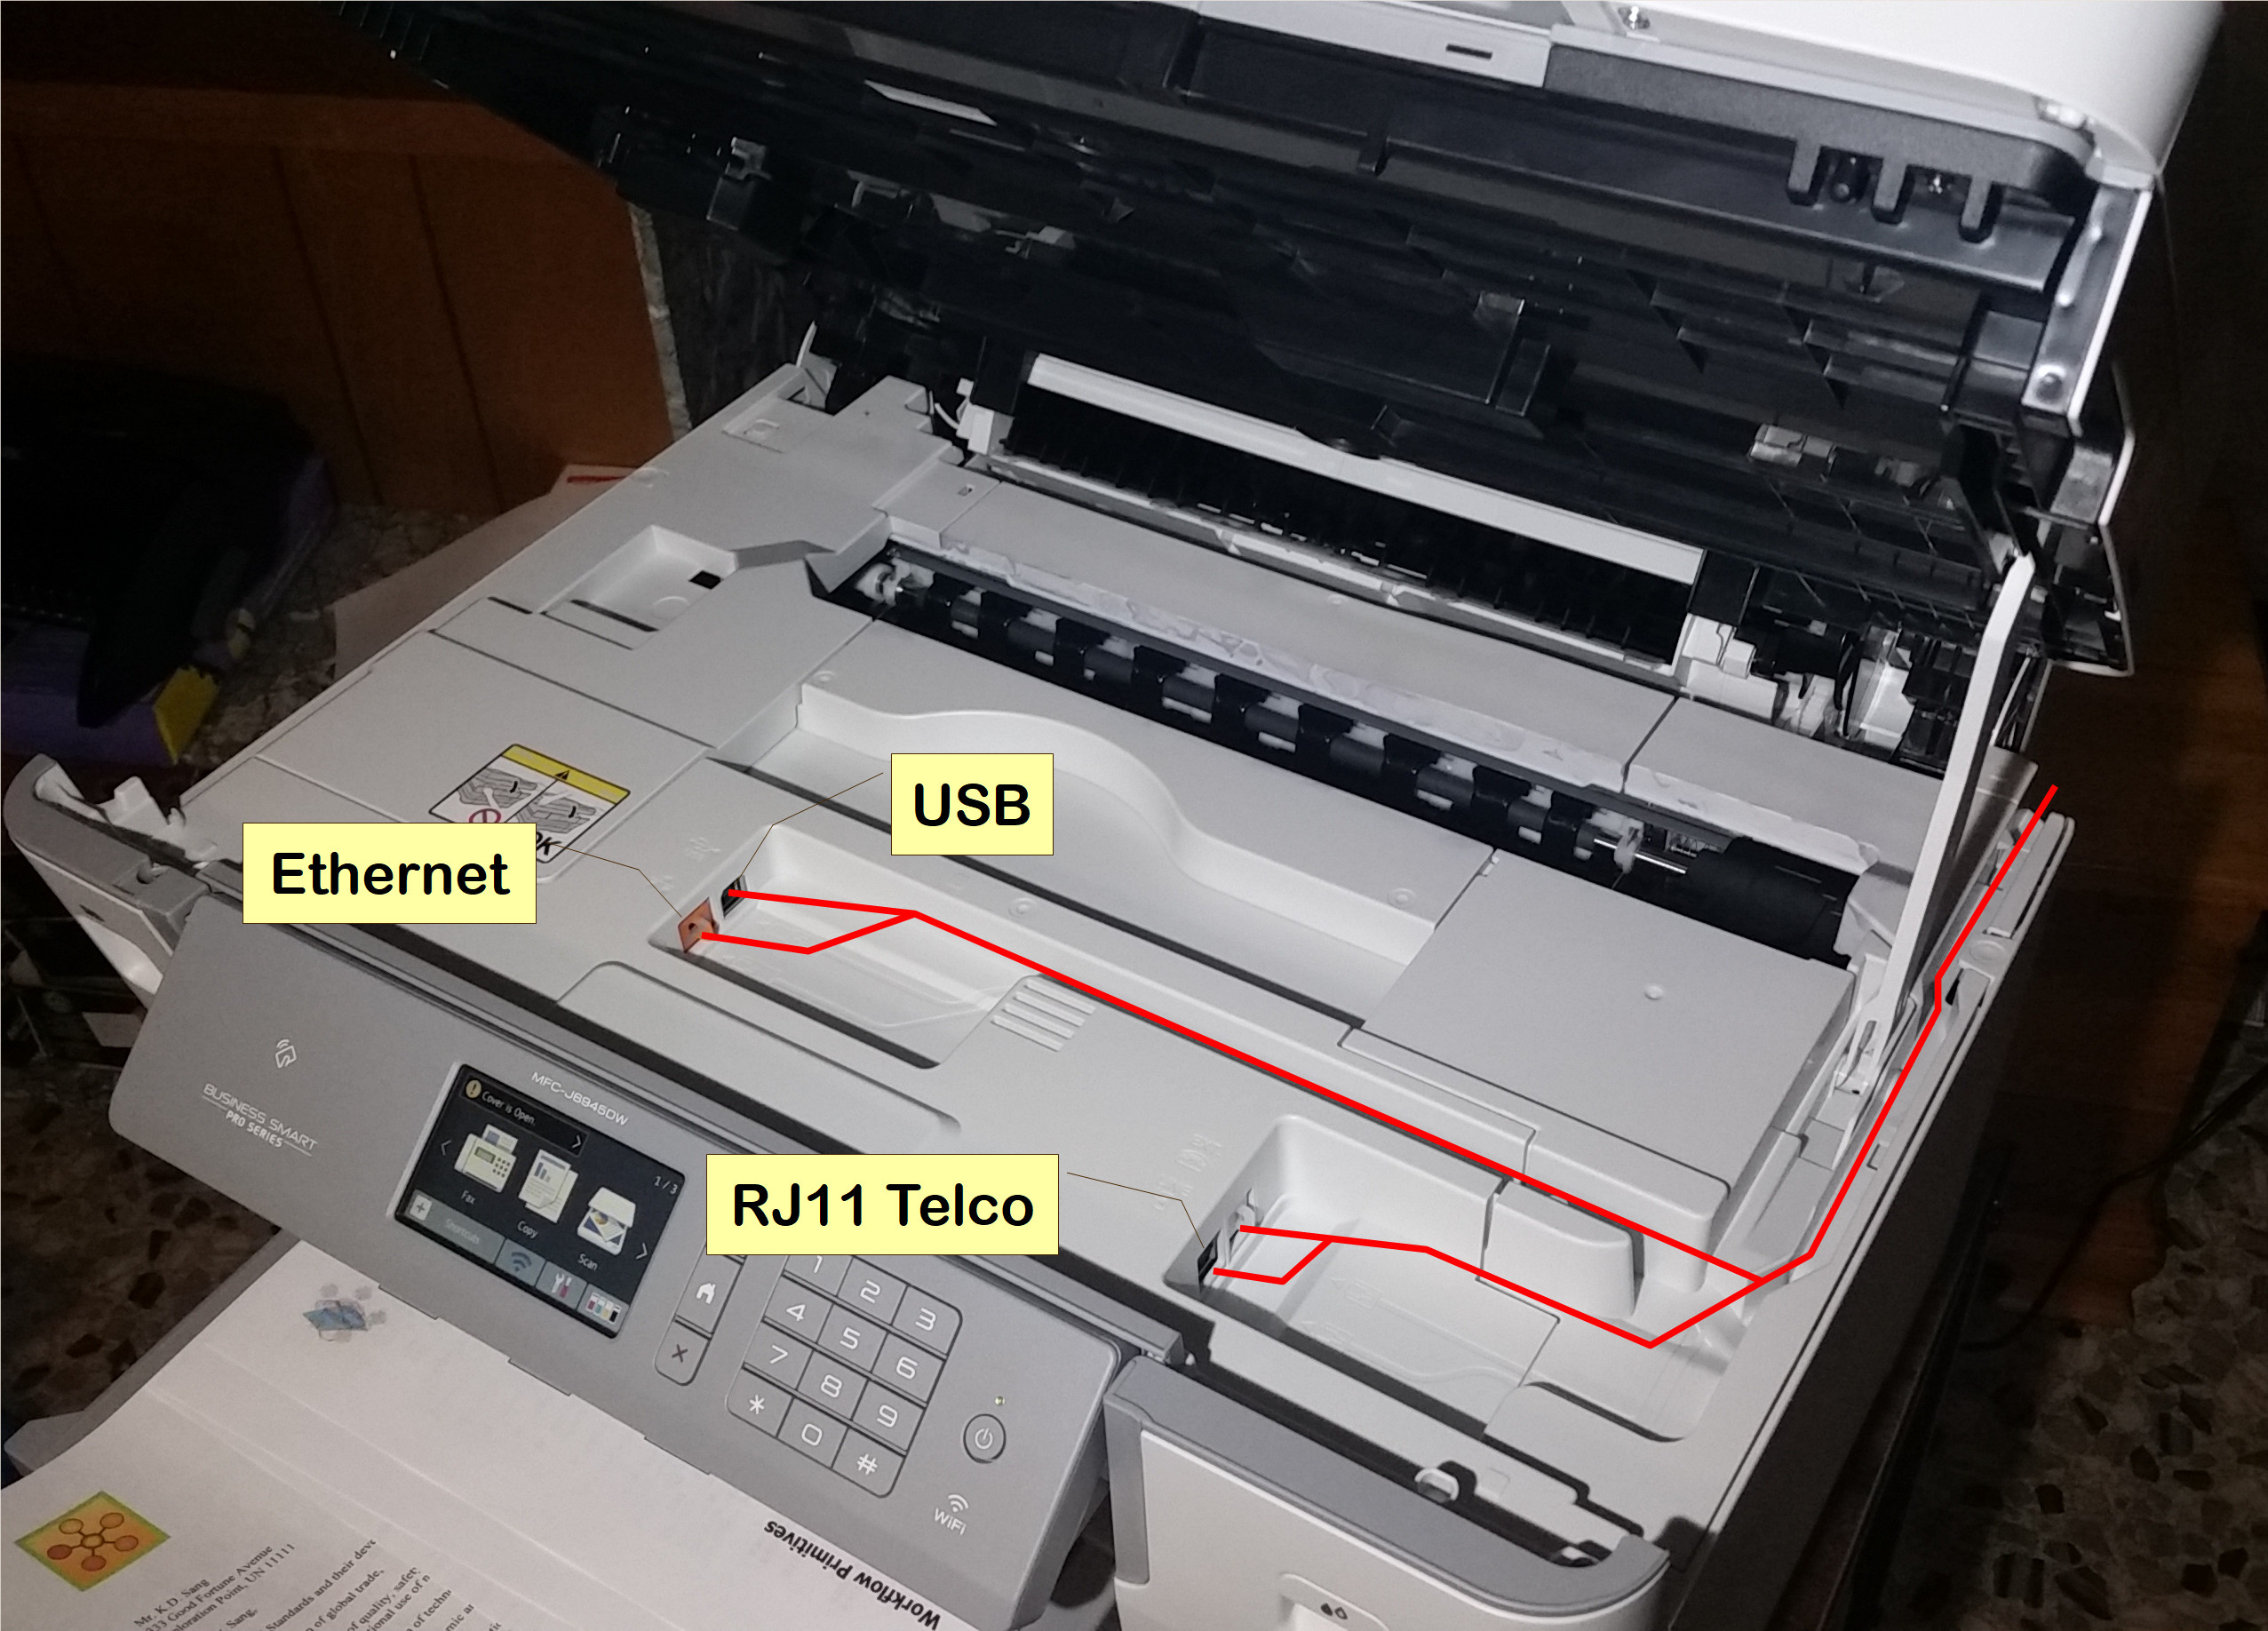
The second area that impressed me right out of the box was cable routing. Printers almost always relegate all the cables to a back corner of the printer. This is fine for when the printer is fully installed, and if there are never any problems. But as anyone who has ever worked on a network or printer before knows, nothing is ever truly fire and forget. It’s not a matter of “if” but “when” something will happen that requires some amount of mucking about with cables. This printer has the best cabling system I’ve ever seen. The cables aren’t in the back at all. You access them by opening up the secondary lid. The entire scanner assembly flips up to reveal the inside of the printer. Telephone, Ethernet, and USB plugs are all right there. They still route out the back along dedicated cabling paths, so the printer keeps them nicely out of the way, but accessing them when you need to is drop-dead simple. Once again, this isn’t a make-or-break feature. It’s just another of those things that shows Brother takes customer usability seriously.
Ink – It’s a Front Loader!
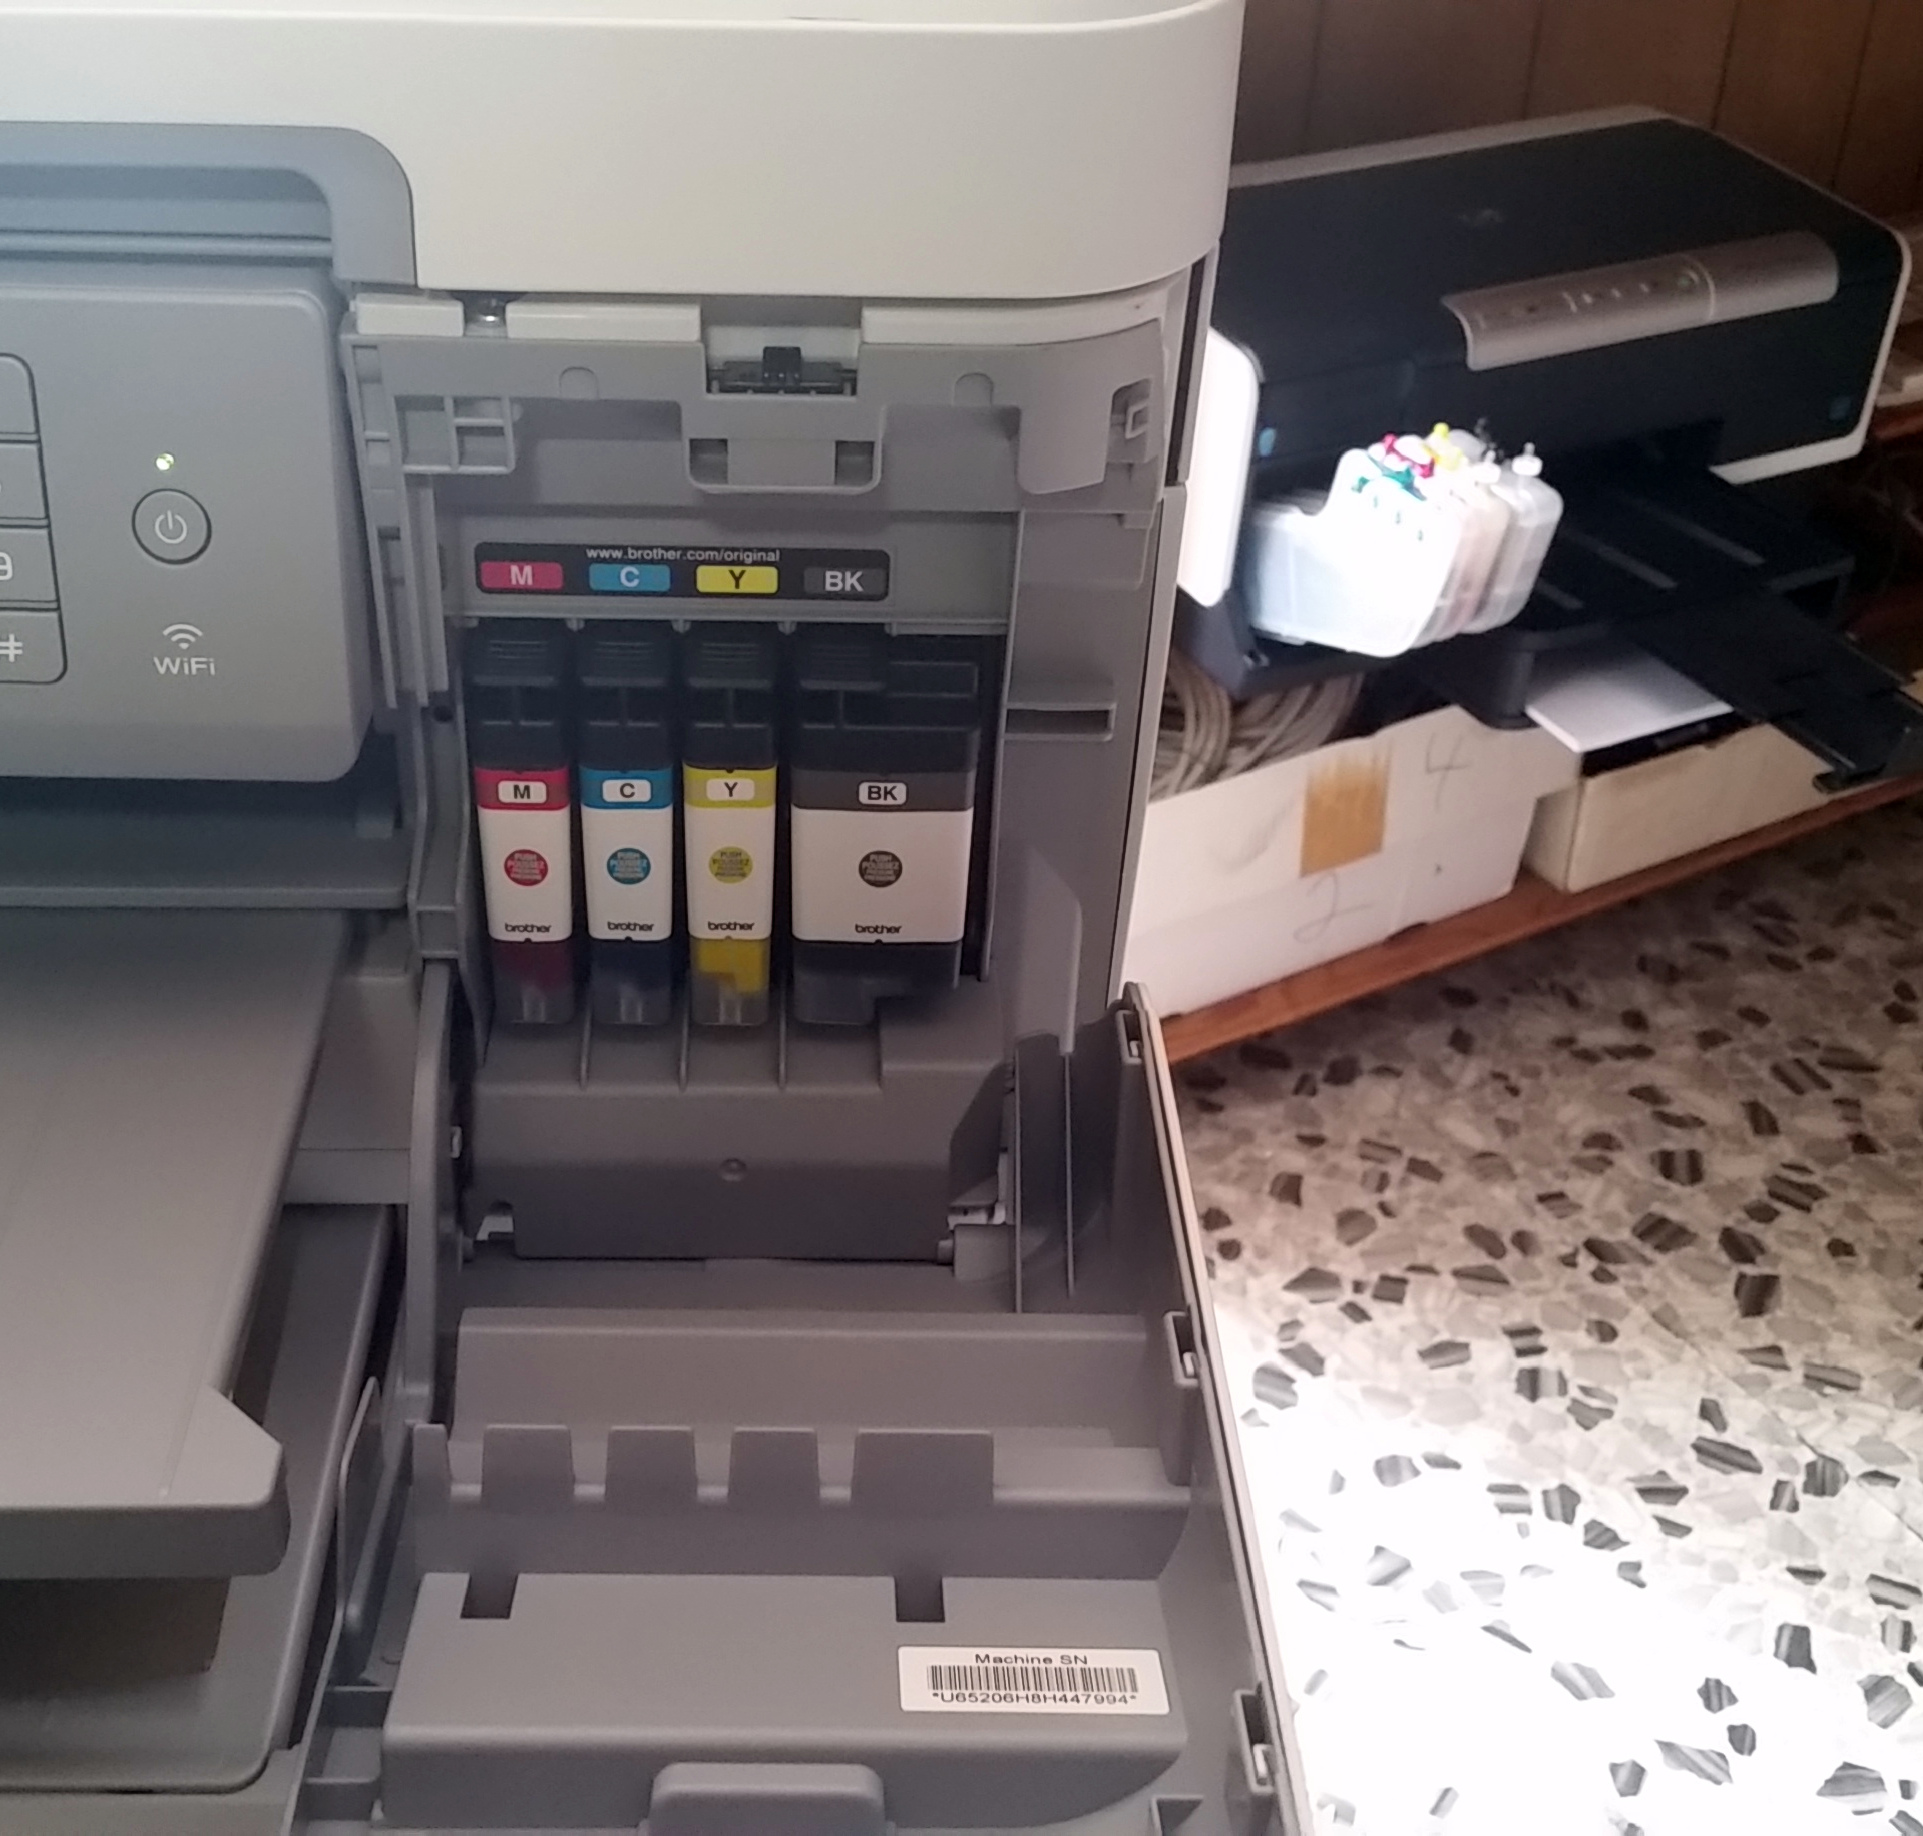
Installing the ink was particularly easy since this printer is a front-loader. This is where the ink isn’t in little cartridges that move back and forth with the print head. Instead they are in (normally bigger) cartridges that plug in the front and the ink is pumped into little reservoirs inside, normally right at the print heads. This is the way that really professional printers like the enormous wide-format ones do it. Why is this so great? First of all, it generally means the ink is available in larger, more affordable (per page) cartridges. Brother claims ink costs of a penny a page for black and 5¢ a page for colour. The other reason these are great, is that they are drop-dead-simple to convert to “continuous” ink systems and use aftermarket ink with. The ability to use an aftermarket ink system has always been a requirement for my printers. But while this printer’s design makes that very easy to accomplish, I’m not actually sure I want to with this printer. More on that below in the discussion on bulk ink below.
Software Setup – First Disappointment
I knew before I bought this printer that I’d want to review it, since it’s a pretty new product. Normally when I buy something like this I toss the accompanying CD in the bin and download the known up-to-date drivers. In this case I wanted to judge this printer by what they include in the box. That, and I reasoned that since this printer was a brand new release how out-of-date could the disc be? So in the went the CD. This turned out to be a very poor decision as the included CD was a disaster. The installer hung at the printer detection with no way to cancel, which left the installation in an unknown state. I can forgive this, after all I can’t make a real determination on the quality of the included CD based on how it worked on one computer. But what is really aggravating is the fact the installer didn’t make a Windows System Restore restore-point. This is criminally irresponsible installer design for any installer, let alone one that installs drivers. Plus the uninstaller on the included CD doesn’t uninstall all the monitor/utility bits. This is especially troublesome because all the different little bits on the CD were compiled with different Microsoft Visual C++ runtime versions. I kid you not, I counted no less than four different MS runtime versions that were installed by that CD, and it didn’t even finish. All of the bits and pieces littered over my computer left me with hours of work uninstalling things and then going through the registry cleaning up the bits that I couldn’t uninstall. I was seriously unimpressed with the CD.
After the clean-up, and with much more caution, I manually created a restore point and then downloaded “up-to-date” drivers from Brother. Fortunately, these ones installed without a hitch. I tried it out, and the uninstaller for the downloaded version seems to clean up most of its various bits too, and it also looks like there is only one runtime now. Betterer and betterer. That being said, Brother’s downloaded installer still doesn’t create an automatic restore point. While I love the printer, this is something I actually consider to be irresponsible behaviour in any driver installer and something Brother needs to address. So, for anyone buying this printer, make a manual restore point before you install the drivers, and do not under any circumstances use the included CD.
Printing – Show me the Money!
Finally, after going through that pain, I’m now at the fun part where we get to actually print!
Print Speed
Lets get the nerdy stuff out of the way first, and see how good Brother’s print speed claims are. To determine print speed I’m using slightly modified ISO 24734 tests. This standard specifies how to use three different test documents to work out how fast the printer a) gets a four page document out from hitting print to last page, and b) how fast the printer can output pages once it gets going. The first test is called the First Set Out Time (FSOT) and is measured in seconds, and the second is Estimated Saturated Throughput (ESAT) and is measured in pages per minute.
I modified the standard a little for added realism. Of the three four-page test documents in the standard, one of them is a set of letter-head letters that are way too light on coverage to bother with. The other documents are pretty good at mimicking real-world print jobs. For simplicity, I use the PDF document, which is four pages each, one a different document type:
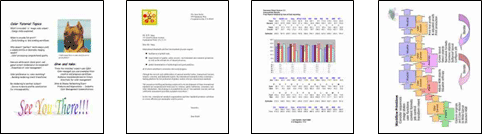
I consider that to be a really good estimator of real-world print jobs, so I use that PDF. I also print collated. For printers which output pages face-up, printing collated means that the entire document has to be sent to the printer driver before it can start printing, because it has to start printing with the last page first. This is so that the pages are in order on the output tray. This slows down the print slightly, but, this is how normal people print so it’s how I test.
Here is a breakdown of all the print speed tests done:
| Colour Simplex | Colour Duplex | B&W Simplex | B&W Duplex | |
| FSOT | 16.3s | 23s | 13s | 22.3s |
| ESAT | 19.8ppm | 11.8ppm | 21.8ppm | 12.4ppm |
I also include duplex print speeds, since this is becoming more and more the norm. Brother doesn’t advertise duplex print speeds (because they are slower), but otherwise my results table matches their numbers pretty closely. For an inkjet printer, it’s a pretty zippy machine. One way it accomplishes this is through the clever trick of simply using its wide format capability to printer letter paper sideways in landscape mode. Reduced paper travel distance means increased speed. Another way the speed is increased is by the printer picking up the next page to print before the previous page is fully finished and ejected. This is something most good laser printers have done for a while, but it’s rare for inkjets to be designed to make this possible. This requires the paper pickup and its gearing to be able to operate independently from the paper feed and its gearing. I was pretty impressed when I noticed this bit. The Epson WF-7720 completely lacks this ability.
Print Quality
| Black | Greyscale | Colour | Photo | |
| Brother MFC-J6945DW | 9 | 9 | 9 | 8 |
| Epson WF-7720 | 9+ | 3 | 6 | 7 |
| Laser | 10 | 8-10 | – | – |
All output was done at each driver’s standard quality settings, except for photos which were done at the best output quality obtainable but using each driver’s default settings for photo correction/enhancement.
- Black: On the Brother, black text is crisp to the naked eye and readable down to font sizes that are below my ability to resolve without magnification. With the naked eye, good laser printed black text is slightly crisper. Under magnification, if it is straight black you are considering (and not any form of greyscale) the Epson WF-7720 may just barely edge out the Brother MFC-J6945DW in text crispness, but it’s actually a hard call to make and even then it’s not noticeable with the naked eye.
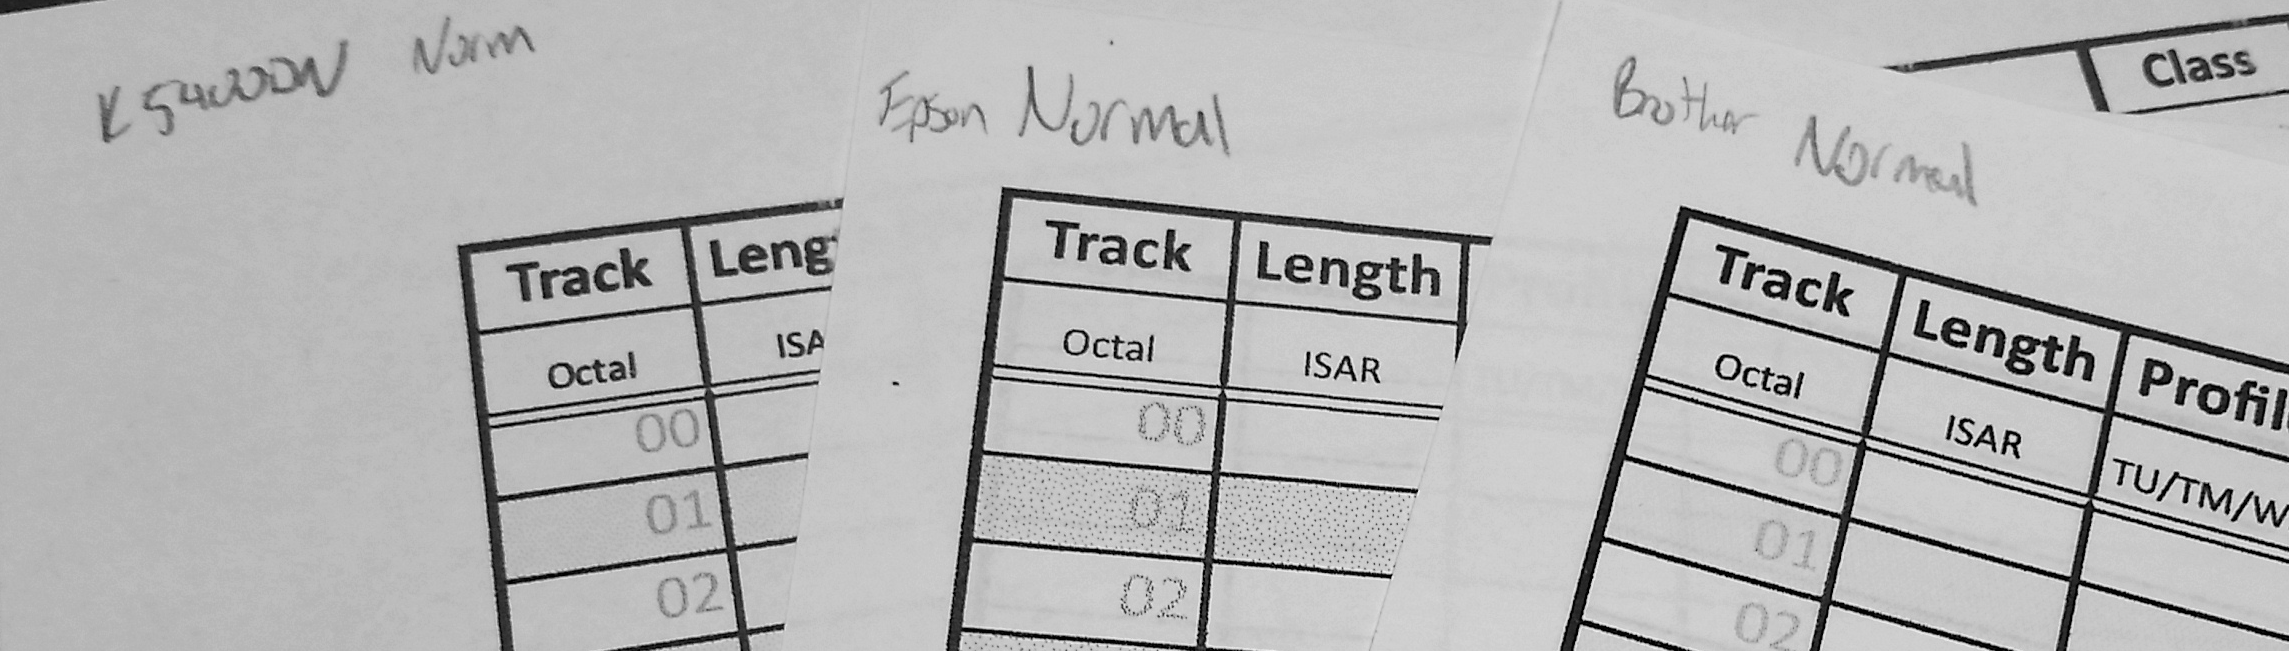
- Greyscale: Greyscale anything on the Brother is simply fantastic. Dithers, gradients, and greyscale text and shapes are fantastic. Even light-grey text is crisp and readable. Normal-quality output is eminently readable and professional looking even at very light greys, which is excellent especially considering how fast this printer prints. Surprisingly, the Epson is notably terrible in comparison. And I do mean truly awful. Anything that isn’t pure black on the Epson has dithering with large, widely-spaced dots that makes it almost unreadable and which makes it look like it was printed on an old dot matrix printer. My 12 year old HP K5400DN is visibly better quality and I’ve included a photo to prove it. What makes this most surprising about the Brother vs Epson greyscale output is that the Epson has 800 black nozzles vs 420 on the Brother. The Brother has far more colour nozzles (1260 vs 768), but the Epson PrecisionCore head is pretty much designed for text and greyscale. Brother is doing some great work here.
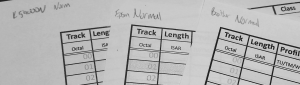
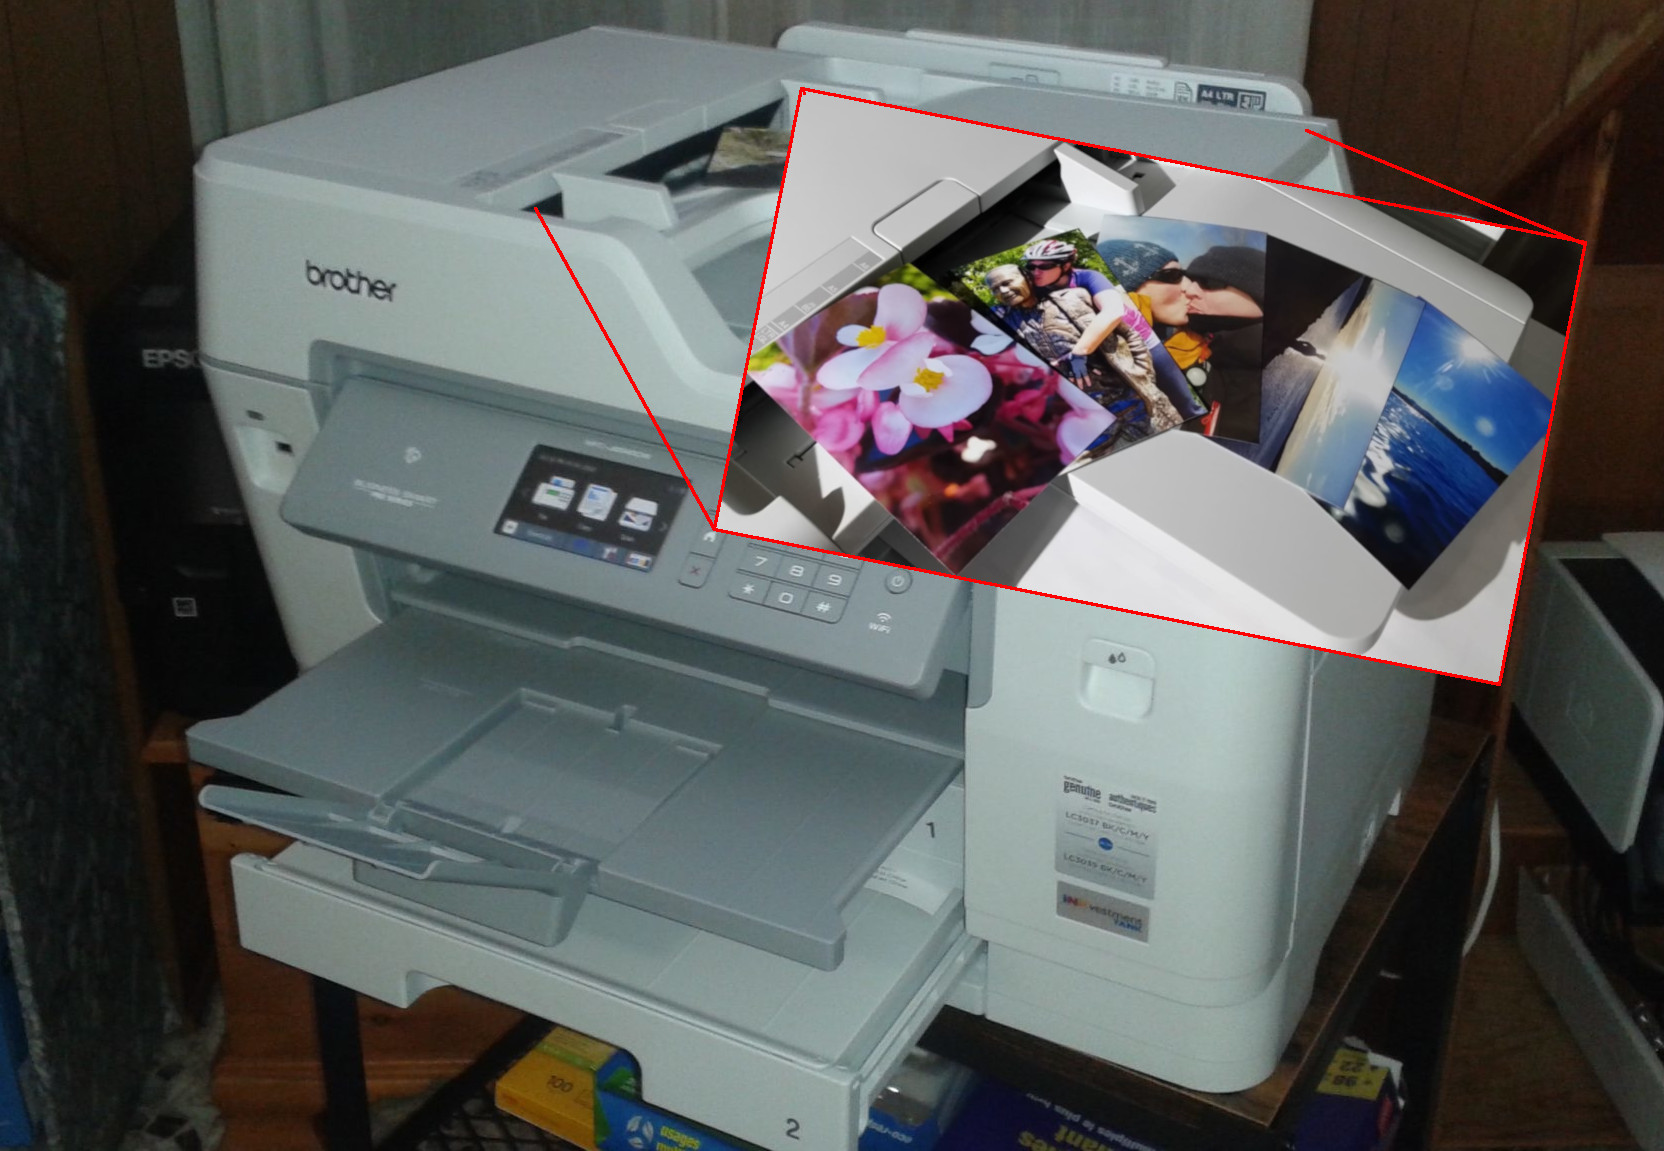
Brother vs Epson Text with K5400DN for further comparison -
ISO Test Print Output Colour: With some solid colours on this printer there can be a very slight banding noticeable. Under magnification this seems to be an interaction of the dither pattern with the colour dot spacing. It has to be looked for to be seen though, and doesn’t really detract. I would feel comfortable using its colour output for almost any business purpose. The Brother is notably crisp on plain paper and produces some of the nicest plain paper full colour borderless posters I’ve ever seen. The Epson WF-7720’s colour graphics again suffer in comparison from the same halftoning issues as it does under greyscale. Colours tend to use less of the kind of dithering that greyscale uses, so it’s not as noticable, but it still detracts.
-

Selection of photos The photo output quality was a pleasant surprised, and I was already anticipating pretty high quality photos from reading the PC Magazine review. PCMag is correct in stating that photo output is superior to what you’ll get in drugstore photo stations. I’d go a step further and suggest it is as good as some dedicated 5-colour photo printers I’ve seen. The Brother printer driver doesn’t suffer fools in that it gives you pretty much exactly what you ask for. Some printer drivers will really amplify the colour saturation by default. This printer isn’t like that, and I really like that. It means it gives you pretty accurate output. The Epson WF-7720 driver seems to want to take matters into its own hands and tries to give you what it thinks you want, rather than what you ask for. This can sometimes lead to the Epson’s photo output seeming to look more saturated until you compare both photos against the original and realize the Brother photo is far more accurate. If you’ve ever watched an episode of CSI Miami and noticed how they cranked up the colour saturation on that show, then you’ll understand what the Epson driver seems to do. Brother’s driver is quite capable of photo enhancements and of tweaking the photo saturation and colours. By default, though, it values output accuracy over unasked for flash.

Copying
Copying is fully functional on this machine, but in one important way it’s not done nearly as smartly as it could be. Copying is probably the weakest area of this printer. when it comes to multi-page documents. When when you put a multi-page document the ADF, you normally want your copied output to be in the same order as the input. This printer calls that “sorting”, though most people call that collating. This printer doesn’t sort multi-page documents by default. It copies in reverse order. It’s perfectly capable of sorting, but when it does sort it doesn’t do it very smartly.
To understand why this is so, the printer mechanism has to be explained a little. This printer prints face up. This means, for printing multiple pages, in order to give you the last page on the bottom and first page on top, it has to print the last page first. But the scanner is set to scan pages face up, taking the top sheet first and last page last. To copy a set of pages and output them sorted (collated), it has to scan the entire stack on the document feeder before it can start printing the first page.
The thing is, Brother’s ADF scanner is perfectly capable of scanning both sides of the page at once. Which means a simple firmware tweak could change it from being a copier where you place your documents face up to one where you place them face down like most dedicated copiers. This way it would scan the last page first and could start printing right away when it’s set to output sorted. The option to copy sorted could then be on by default, where it is now off by default and you have to turn it on every time.
Copy speed
Copy speeds are according to the ISO 24735 test document, which is the same four-page PDF as used for print speeds:
| Simplex Unsorted | Simplex Sorted | |
| Four Page Test | 26.7s | 34.7s |
On a four-page test document, the eight seconds extra it takes to copy sorted isn’t really an issue. The fewer pages and/or the more copies you print, the less of an issue it becomes. However, if you want one copy of a 40 page document, there is no way you want to hand flip the pages into the right order, and waiting for it to scan the whole document before it even starts printing the first page may make you want to hit start and then go get a coffee.
There is one trick you can use to mitigate this problem, but it only works on 2->2 copying (double-sided input to double-sided output) and only if you want just one copy. That trick is to leave the machine set on copying unsorted, then put the originals in the ADF face down. The output will come out in the right order face up, and will have started copying after the first page was scanned. This trick, as mentioned, only works if you want a single copy.
Copy Quality
Colour copying quality is quite good. As good as any dedicated colour photocopier I’ve ever used. It has a thin-sheet mode for copying paper that might be somewhat see-through, and this works quite well as tested on full-colour catalog pages. You can set the quality from text to photo. Even onto plain paper the copy quality is quite good. If you copy output that was produced from another printer, it’s virtually indistinguishable from the original. If copying, say, a glossy full colour catalog page, then be prepared for some inaccuracy, simply because offset printing can use colours that are not duplicatable in the CMYK colour space. Even here, though, it was surprisingly good, with even tiny text readable.
Black and greyscale copying is quite excellent. If you compare it to the Epson WF-7720 then it’s simply superb. This is due to the fact that the Epson’s greyscale copying suffers from the same poor dithering problem that its greyscale printing does.
Scanning and Faxing
Scan-to-Anywhere
Here is another area where this printer shines, and it is obvious that Brother spent some time getting this right. Part of this is the fact Brother includes virtually every kind of network connectivity known to man. This printer can be set up with its own email account to send email (and thus scans and efaxes). It can be set up to send scans to another computer on or off your local LAN via SFTP. It can scan to a shared LAN directory over standard Windows networking (SMB/CIFS). It can scan directly to any individual computer on your LAN that has the drivers set up on it. Lastly, it can scan directly to a USB stick or USB-connected card or drive.
Scan-to-PC Means Whatever You Say it Means
What makes scan-to-PC truly excellent is that every user that installs the driver can set it so that their computer’s settings are what the printer uses when you select scan-to-PC from the printer. There are four different scan-to-PC settings: scan to file, OCR, image, or email attachment. I can set it up so when I go to the machine, put a document on the feeder and select “Scan-to-PC->File”, then it means save it as a 300dpi colour multi-page PDF. We could set it up so that the same function saves it as a 600dpi one-page-per-file JPEG when it’s used to send to Michelle’s computer.
OCR
Brother’s Scan-to-PC also has an OCR mode that is frankly amazing. I did not expect this, didn’t know that it even had the feature, and yet it has now become a staple of how I use this machine. It is hands down the best OCR I’ve ever see outside of a dedicated piece of OCR software. By default, Scan-to-PC->OCR saves a flat text file on your computer. However, you can configure it so that it will preserve the original document formatting as either a searchable PDF, or as a rich text document file that you can actually pull into LibreOffice, Wordpad, or MS Whatever and edit! With the formatting. How much of the original formatting is saved depends on the document complexity, and quality. The scanned test letter from the ISO test OCRed perfectly, including the letterhead graphic. I was jaw droppingly astounded.
I expected the Epson WF-7720 to handily beat the pants off this printer when it came to scanning. The Epson Scan software has been a strong point for Epson for years. Their recent offerings, though, have been less than stellar. You can’t access OCR through the printer control panel and OCR is only available as searchable PDF. It’s quality is quite lacking. A test where the Epson “Start Here” document was scanned to searchable PDF on both printers produced about 90% accuracy through Epson Scan and better than 99% accuracy through Brother’s.
Faxing
This has to remain in the “mostly untested” side of this review, since I don’t have a land line. What I have tested is eFax, which is essentially just emailing a TIFF to/from the printer. The printer can be configured to print any TIFF sent to its email account, just as if it were a normally received fax. It works well but has one glaring limitation that will be covered below.
Connectivity
This printer can connect and communicate (physically or over the network) in almost every way imaginable. It’s probably shorter to explain the two things that are conspicuously missing than to try and get into detail on everything it includes.
So what’s missing?
5GHz
First of all, although it has Wi-Fi, it’s missing support for Wi-Fi at 5GHz. This is becoming more important as the density of Wi-Fi signals increases and channel congestion gets worse. It’s also a performance issue. Much higher speeds are available at 5GHz.
Print-From-Email
The printer, as mentioned above, is capable of connecting to a mail server over SMTP and POP/IMAP in order to both send and receive email. So it can send scans or efaxes over email. It can also receive and automatically print an efax. What it can’t do is receive and automatically print anything in colour or high res. It is limited, strictly, to printing out email attachments that are black and white fax G3 TIFF files. Absolutely nothing else.
Previous Brother all-in-one printers had the capability of automatically printing what they called colour efaxes, which was just a PDF scan received over email. This is functionality that Brother actually ripped out for this printer. There is literally no technical reason why the printer couldn’t print out a PDF received as an email attachment. It already has the ability to render and print PDFs. So why did Brother take out this fantastic feature? My sneaking suspicion is that it was required in order to get the license to use Google Print. Google loves improving connectivity, but only in ways that foster a dependence on their infrastructure. Having a printer that can just print out any PDF you email to it without going through any third party detracts from people depending on Google.
What is Included?
Connectivity wise, then, what is included? Well, honestly, almost everything shy of smoke signals:
Phyical Layers:
- Wi-Fi 802.11b/g/n
- Ethernet
- USB
PC-to-Printer Printing Protocols:
- LPR, IPP, Raw
- Airprint/Bonjour
- Mopria
- Web Services/Mobile Printing for Windows
- Google Cloud Print
- FTP server (yes, you can submit print jobs over FTP)
- IMAP/POP email (limited to B&W TIFF G3 Fax)
Printer-to-PC Scanning Protocols
- Scan-to-PC
- SMB/CIFS (Windows networking)
- SFTP
- FTP
- SMTP email with optional LDAP
That isn’t an exhaustive list of connectivity options, but it hits all the key players.
Printer Languages – Postscript AND PCL
We’ve talked about how this printer kicks the pants off the Epson WF-7720 for greyscale print quality and colour graphics. What wasn’t covered is why. The reason for this is likely because of another high-end business feature this printer has, which is dual support for both PCL6 and Postscript. The Epson WF-7720 is tooling around with ESC/P-R, a raster print “language” (calling it a language is giving it more credit than its due). I have a strong suspicion that Epson’s poor showing in greyscale and dithered colour has to do with the tradeoffs they are making by everything essentially having to be rasterized before it’s sent to the printer.
Whether or not some of the print quality differences noticed between this and other printers are due to the printer language, the fact is that Postscript and PCL 6 support still give this printer huge advantages. Linux support is drop-dead-simple for Postscript printers. Also, for Windows Brother offers universal PCL and Postscript drivers that allow you to control multiple devices with one driver – which is fantastic for an office environment. Postscript support also gives this printer the ability to natively render PDF files. This is great as a connection option of last resort. If all else fails, if you have a guest with a wacky computer you just can’t (or don’t want to) get on your network, then just export that must-print document as a PDF and put it on a USB stick. The printer can print a PDF right off a stick. This is, with some professional copiers, a last resort I’ve had to rely on and it’s a great universal fallback.
Aftermarket Ink Prospects and Price-per-page
Bulk Ink?

We touched on the front-loading ink and the tact that it makes it easy to use bulk ink. There are two general ways of using aftermarket ink in your printer. One way is to use aftermarket refillable cartridges. The other is to install a Continuous Ink Supply System (CISS). The latter uses ink cartridges that are connected to larger ink bottles with tubing. As the cartridges are depleted new ink is drawn in from the bottles to keep them continuously full. The Epson ET-16550, shown at right, is an example of where the manufacturer has factory-bolted this kind of a system onto their printer. It has ink bottles on the side and they connect with flex tubing to the print head reservoirs (which in that case are just a modified Epson 252XL cartridge system)
CISS kits are most often used on printers that have relatively small print cartridges that are located directly on the print head so they move back and forth with the head as pages are printed. The beauty of the Brother MFc-J6945DW is that it doesn’t have cartridges like that. It uses a more professional approach – larger front-loading cartridges that are separate from the print heads. This is basically a form of CISS in and of itself. There are pumps which take ink from the cartridges to small reservoirs at the print head. In this case, simply using aftermarket refillable cartridges tends to be the best way to use bulk ink with this kind of printer.
There is already bulk Brother-compatible pigment ink on the market (this printer uses the same pigmented ink as most Brother inkjets). Aftermarket cartridges aren’t yet available for this printer, though. I’ve contacted inkowl, one of the more reputable outfits for refillable cartridges, and they say cartridges are forthcoming. They should be available in two sizes. One size will match the existing Brother cartridges. The other, similar to what you can see coming out the front of an old OfficeJet Pro K5400DN in the background (click on the photo to the right), are extended so they come out the front of the device. These can allow some truly stupendous ink capacities, and have refill holes that are easily accessible on the top.
Is bulk ink needed?
The real question for this printer, though, is do you even need bulk ink? That’s a question I haven’t fully answered yet myself. Brother claims a price-per-page at 1¢ for black, and 5¢ a page for colour. Those are based on 5% coverage for black and 5% per colour coverage for colour. I tend to double my coverage estimates for normal printing, so 2¢ and 10¢ a page. A full colour 4×6 photo is about equivalent to 25% coverage of an 8.5×11 page, so think around 25¢ a photo for them. If you use good quality plain and photo papers, then the cost per page for the ink for black and for 4×6 photos is roughly equivalent to the cost of paper. That tends to be my decision point. If the manufacturer’s ink costs more than paper, I tend to favour using bulk ink. If it’s less, I favour the use of OEM ink. This printer is skating around that demarkation line. Refillable cartridges aren’t available quite yet anyway, but even when they are, I am actually leaning toward keeping this printer using only original manufacturer ink. I have never found, ever, an aftermarket ink that was 100% accurate in its reproduction of the OEM ink. I’m not concerned about it hurting the Brother’s print heads. Brother uses piezo technology heads which are pretty good that way. But at this point I don’t want to jeopardize the great quality photos I’m getting out of this machine. Knowing that this printer is an excellent candidate for a bulk ink solution was definitely a purchase factor, but for now, Brother has done a great job of making their inks affordable enough that I don’t feel the need to explore that avenue just yet.
Conclusions
The Brother MFC-J6945DW printer is a device that consistently punches above its weight class in almost every category. The consistent attention to detail is evident everywhere. Specifically areas this printer shines are:
- PCL6 and Postscript
- Advanced paper feed that picks up the next sheet before the previous one is done and two large paper trays plus a rear feed that takes another hundred sheets
- High quality photos
- Everything-shy-of-smoke-signals connectivity
The driver CD that accompanies it is a notable departure from Brother’s standards otherwise, but you should be ok if you download their drivers (and create a restore-point before installing them). Even thinking about this and the other minor areas where this printer falls short, I have to admit, it really only falls short in comparison to the amazing attention to detail Brother has otherwise given this design everywhere else. What is most telling, is that to find an all-in-one printer that is even remotely capable of competing with it, you have to jump up to something like the $1500 price range Epson WorkForce Pro WF-8590. Anything that is remotely in the same price zone, like the Epson WF-7720, feels like a toy pretending to be an office printer when held up to the Brother.
That is why, for either home or office, I can most wholeheartedly recommend the Brother MFC-J6945DW printer.
Disposition
- Purchased March, 2019
- Currently remains in service as my primary printer/scanner/copier
Brother MFC-J6945DW All-in-One Printer
Pros
- Three paper sources
- Postscript & PCL 6
- 19.8ppm colour simplex, 11.8ppm colour duplex
- Very good photo printing
- Plain paper borderless printing
Cons
- Output tray a bit small
- Won't print PDFs it receives by email
- Wi-Fi lacks 5GHz