
I’ve been working on a review of the new Brother printer I bought, and needed some accurate print speed testing. Now “back in the day”, the speed printer manufacturers claimed for their products was ludicrous. Their test documents were a few lines of black text and the result wasn’t how fast the printer could print, it was how fast the printer could feed paper through to the eject tray.
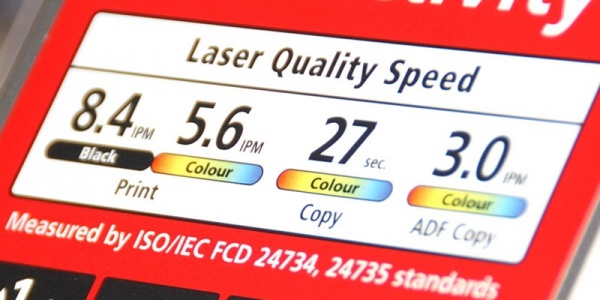 This started to change in 2009 when a standard was released, ISO/IEC 24734. This standard has slowly been adopted in one way or another by most printer manufacturers. To meet that standard, you have to test printers with a set of documents intended to mimic real-world print jobs. There is also standard ISO/IEC 24735 for testing copying speed on multifunction printer/copiers.
The exact texts of those standards are, unfortunately, anyone’s guess. The ISO goes to a lot of trouble to make you think you have to buy them in order to see them. However, enough printer manufacturers publicly release their methodologies that the test parameters aren’t too hard to figure out. And I was able to find the test documents on an ISO content server, so they are publicly accessible. They just go to a lot of trouble not to draw attention to them. Sort of like putting them in the proverbial locked filing cabinet in the back of a disused lavatory with a sign on the door saying “beware of the leopard”.
Anyone can use a stopwatch and get results accurate to within a half a second. Dedicated review sites like PC Magazine use special test gear to do the measurements for their reviews. Wouldn’t it be nice to do a printer review and say your print speed tests are are just as (or more) accurate? It’s actually pretty easy to do these measurements at home and get results as good as or better than what the professional labs get with specialty gear. In fact, with a bit of cleverness you can get results down to the millisecond, and all you need is:
- A modern smart phone
- A computer
- The ISO test documents
- The ability to print Word, Excel, and PDF files.
LibreOffice does nicely for the Word/Excel documents
SumatraPDF works great for the PDF. - The open source audio editor Audacity
The ISO standard calls for testing with each of the three different four-page test documents. Each in their own way are supposed to represent a realistic real-world print job. These documents are:
- A word processing document with four one-page letters

- A spreadsheet document with four pages of numbers and graphs
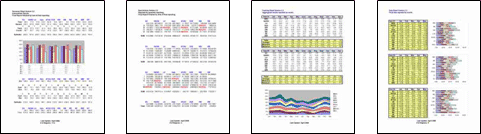
- A PDF document with four pages of different document styles (publisher-style page, a letter, a spreadsheet, and a presentation page).
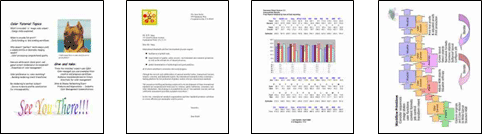
Technically for the ISO tests you are supposed to use either a mix of all three, or each of the three individually then average the results. However, I find that the word processing document is too focused on letters and most of them are pretty short. The PDF document has a good mix of black and colour, and is a good mix of what you see in real world print jobs. for my tests I tend to go just with the PDF, or the PDF and spreadsheet for real-world results.
Once you have the test files, you can perform the same tests the ISO standard calls for. There are actually three different tests:
- First Set Out Time (FSOT)
The number of seconds it takes to print a four-page test document.
This test is measured from when you click “OK” on the print job to the end of the last page ejecting. Technically, the times for each of the three document types is supposed to be averaged. - Estimated Saturated Throughput (ESAT)
The average number of pages per minute the printer is capable of doing not including the “first page out” overhead.
This test is performed by submitting a four-page print job set to print two copies, and then measuring the time it takes from the end of page four ejecting from the first copy to the end of page four ejecting in the second. Pages per Minute = 60 / (Time / 4) - Effective Throughput (EFTP)
The average number of pages per minute printed over three (a short, medium, and long) print jobs. The short print job is just one copy of a test document. The medium is one copy plus however many it takes to make the job about 30 seconds. The long job is made from sending one copy plus however many it takes to make the job about four minutes long. The added jobs are supposed to be a random mix of each of the three documents. At the end, take the total number of pages printed and divide by the total time they spend printing and you get a pages-per-minute value.
I find the EFTP test to be really clunky. It’s trying to include the first document “overhead” in an average pages-per-minute metric, but it assumes that people will tend to print short:medium:long documents in a 1:1:1 ratio. What I normally want to know for my printer is how long will a normal every-day few page document take to go from “OK” to done. If I have a long print job to do, I really just want to know how many pages it’ll rattle off per minute – the few seconds of overhead in getting the first page out doesn’t interest me for a really long job. So on my reviews, I’ll publish FSOT in seconds and ESAT in pages per minute. I also tend to publish for both single-sided and duplex output.
Now, how to measure them. PC Magazine and other professional testing labs use special gear to measure the time from when you click ok to when the last page comes out. However, you don’t need the professional gear to get professional results. All you really need is your cell phone, and a copy of the open source audio program called Audacity.
Here are the steps for calculating First Set Out Time.
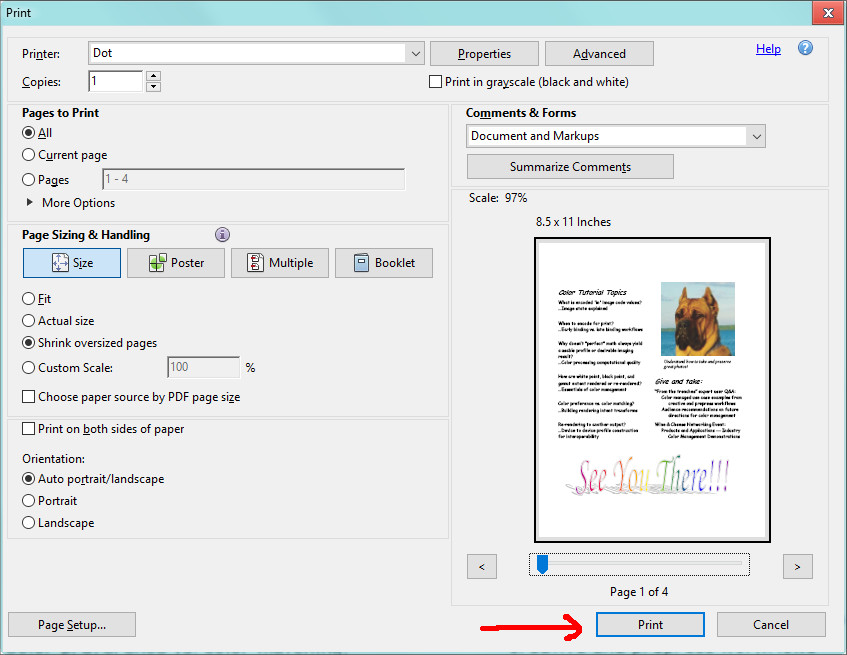
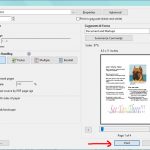 Get the print job all ready to print for whichever test document you’ve decided to use. Use the settings that will be used to produced normal every-day use output. Usually this is labelled “standard” quality. Once all the printer options are set, and you are ready to click “OK” on the print dialog, hit the TAB button on your keyboard until the OK button is the highlighted button. This means that when you hit ENTER, it will click that button.
- Open up Voice Recorder (or the iPhone equivalent) on your phone, and start it recording. If you are going to be saving these results, then do yourself a favour and give a quite verbal annotation of the test and the printer. Then give a countdown, omitting the last couple seconds so there is a bit of a pause, then…

- Holding the phone close-ish to your computer, with a good strong rapid tap, hit the enter key.
- Move the phone so it is close to the printer so the microphone can hear the printer. When the last page slides out, stop recording. If you are doing a test like the ESAT where you need to measure the time from the end of page 4 of copy #1 to the end of page four for copy #2, then when the printer is about to print page four say so so that it’s on the recording, it’ll make figuring out the results easier later.
- Transfer the audio file to your computer.
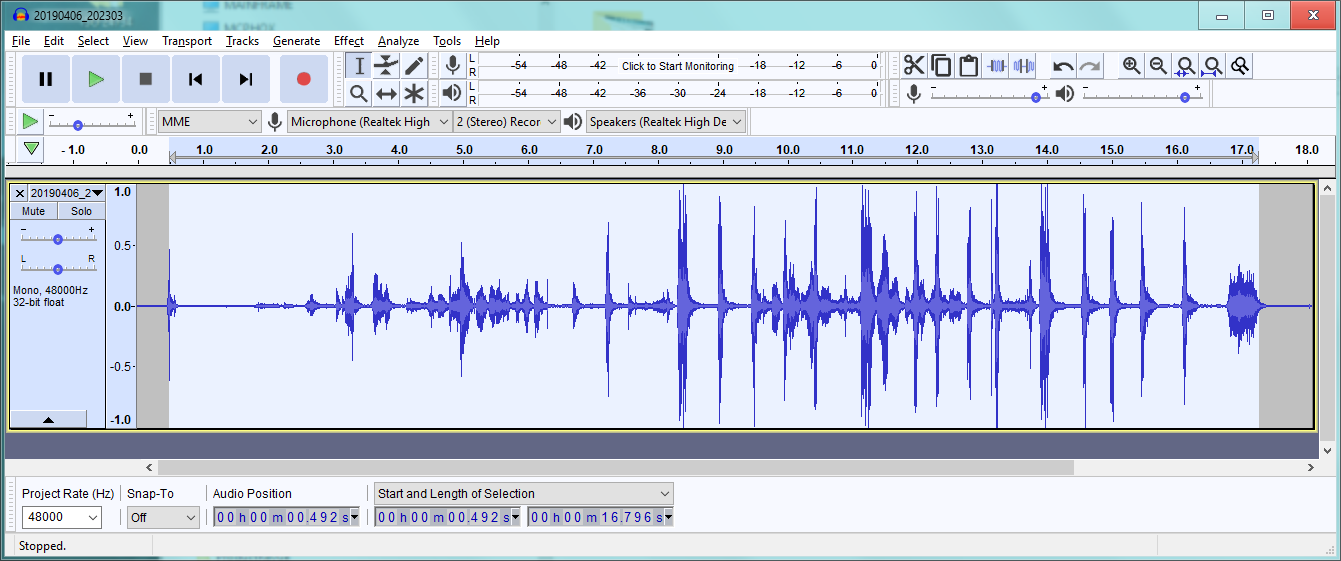
- Open Audacity and drop the audio file onto it.
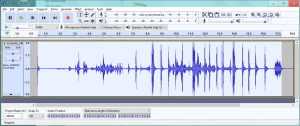
Printer test from the ENTER key tap to the last page ejecting - You will see a visual representation of the audio waveform. If you gave the enter key a good strong tap, it should be quite visible at the beginning. This is important for the FSOT test, where you are measure from the press of the enter key to the last page out. Use the mouse to select and drag from that tap to the end of the sound of the last page ejecting. There is a video clip below that will go into more detail on this.
- At the bottom make sure that Audacity is set to show the start and length of the selected clip. You now have the exact amount of time, accurate down close to the millisecond, for how long that print job took.
There you have it. Whether you want to make your own printer review, verify the times of other reviews, or just are curious to see how your printer measures up to real-world printing, this will let you get the kind of accuracy that places like PC Magazine’s test lab uses specialized equipment for. This same method can be used for ESAT (Estimated Saturated Throughput) and EFTP (Effective Throughout) measurements too.
Feel free to check the video for details on using Audacity.
Congratulations. You’ve just used a ubiquitous smart phone and an open source audio editor to get printer test results better than what the professional labs get with dedicated gear!